Search Results for: audio

HDAudio driver is complete!

blog_devI am happy to announce the release of the finished HDAudio driver for the AmigaOne X1000!

The driver now supports recording as well as playback. It also now supports S/PDIF optical output.

There have been questions about whether full “32 bit” audio really makes a difference. I’d like to dig a little deeper to better understand the technical specifications.

There are two primary factors that contribute to the quality of a digital sound recording. One is resolution, or how many bits per sample, and the other is sample rate, commonly 44100 or 48000 samples per second.

As you look at the waveform of a sound recording, these two numbers determine the vertical and horizontal resolution of the wave.

I’ll begin with the “bit width” or vertical resolution.

The original Amiga’s sound output supported four channels at eight bits of resolution. Eight bits means there are two hundred and fifty six possible vertical “steps” that can be used as the wave is generated. Now we spread those steps across a -2 volt to +2 volt span and we get 0.015625 volts per step.

At the time of the Amigas introduction, that was a pretty fair sound playback. But only 256 steps is not as “high fidelity” as we might like. As a comparison, Compact Disk Audio is reproduced at 16 bits per sample. This makes for a big improvement in resolution. 16 bits offers us 65536 possible “steps” to spread across the -2 volt to +2 volt range. Now the step size is 0.0000610351562 volts per “step” of vertical resolution. So 16 bit audio is a HUGE increase in accuracy.

Getting back to our driver, AHIPrefs offers both 16 Bit HiFi and 32 bit HiFi modes. But I’ll bet that neither of those modes gives exactly what you might expect. As AHI mixes lots of different sounds together, possibly each sound with it’s own volume and pan settings, it can be useful to have more resolution available to work with. Here’s the clue: ALL AHI modes that say “HiFi” are sending 32 bit data out to the sound device! The “16” and “32” only describe what goes IN to the AHI mix routines. if it says HiFi, you WILL get 32 bit output to your card!

Or will you? In truth, while AHI is making it’s calculations using 32 bit registers and 32 bit math, it only promises 24 bits of accuracy. Is this anything to be concerned about? Not at all. I’ll tell you why. 24 bit samples will resolve to a “step size” of 0.0000002384185 volts per step. Wow! That is about one quarter of a microvolt. Those with an electronics background can probably tell you, that attempts to accurately work at those levels are just ridiculous. We have reached an accuracy that is beyond the ability of our amplifiers and speakers to reproduce. Put simply, 24 bits is the reasonable limit of current technology, or at least affordable technology.

So our 32 bit samples are flying out of AHI and in to the HDAudio codec. While the “container” is 32 bits wide, even the “high definition audio codec” that we have in the AmigaOne X1000 only resolves the top 24 bits. So it seems that in the end, both AHI and HDaudio agree that 24 bits is the reasonable limit for now.

And how about sample rate or the “horizontal” resolution?

How rapidly a sound is sampled and played back can also have a BIG impact on sound quality. It all starts with the Nyquist-Shannon sampling theorem or more commonly the Nyquist theorem. It’s pretty simple. As you record an audio signal, you must sample at at least twice the frequency of the highest pitch being recorded. Any sound that is higher than half the sampling frequency will be converted to noise and nasty noise at that.

So how high do we need? It is generally held that human hearing range is from 20 Hz (cycles per second) up to 20000 Hz. So any frequency above 40000 should be great right? Well Yes and No.

One simple problem is that we still must filter out all sound above half the sample frequency, and most frequency dependent volume controls (graphic equalizers) work with gradual slopes. There is no “hard cutoff” at a certain frequency, so we need a bit of headroom.

But there is another reason. As a high frequency sound approaches the Nyquist rate, we are only sampling about once per half-cycle. While this will reproduce the frequency of the original, it will do it at a bare minimum of accuracy. In other words, as frequencies get higher, they get less detail.

So what does it really matter?
Audio CDs play back at 44100 Hz. Not bad at all.
Television/DVD audio is usually at 48000 Hz. Nice.
With the HDAudio chip in the X1000 we support both of those frequencies.
We also support 88200, 96000, 176400, and 192000.
So we can double or quadruple the sample rates of common media!

At first, I really thought it was all a numbers game, but when developing the driver, I can actually hear the noise decrease noticeably as the playback rates went up!

And that is where I’ll leave off. This was enough of a lesson for one day. I am very happy that I could contribute to the completion of this driver. And the chance to “raise the bar” regarding sound capability was really very nice icing on the cake.

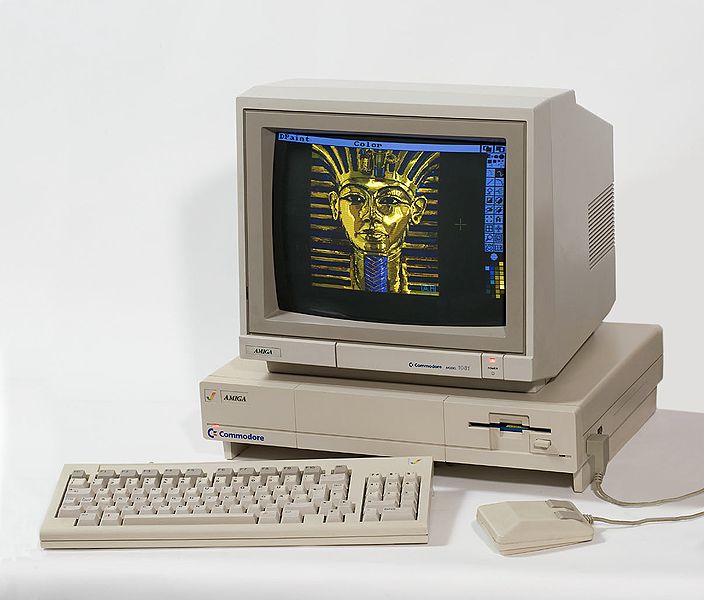
Like many of us, I have been using Amigas for a long time. Today, right here in front of me is an Amiga that supports high definition audio, a modern high performance video card. It uses standard, off the shelf keyboard, mouse, monitor and many USB accessories as well. Most of these we unheard of in the classic days. But with all the new and shiny, it is still AmigaOS to the core.
🙂

Confessions of an Audioholic

blog_devThe HDAudio driver has recently been released to AmigaOne X1000 owners. This driver supports the built in “high definition audio” chip used in this computer.

I am the last coder to work on this driver, but like a relay race, much of the hard work was done before it was passed to me. Davy Wentzler, Alex Carmona, and René W. Olsen did a lot of the heavy lifting before I started on the project.

As far as I know, this is the first AmigaOS 4 driver to support the High Definition Audio standard. this is a new specification from Intel, destined to replace the older AC97 standard. This new standard includes lots of improved specifications in audio fidelity.

We can now play sound out the back and the front headphone at the same time. This has led to having “All” as an option when choosing an output.

It is possible to signal the software when a plug is inserted or removed. And it’s even possible to do a quick “impedance check” when a device is plugged in, and then make a good guess about whether it is a microphone (low level), stereo feed (line level) or the output from an MP3 player (higher level).

The HDAudio standard offers us a lot of new features that we will be exploring for a while to come.

The process of “bringing up” this driver included a few good challenges.

AHI reads a “modefile” that describes the basic features of the sound driver. It opens the driver and asks it to go looking for a matching sound card. If one is found, the driver / card is added to the system.. but when sound gets played it gets more interesting..

AHI specifies to the driver how many channels, how many bits per sample, and how rapidly the samples are about to start coming in. The driver needs to set up the sound chip for this, but it really NEVER talks directly to that chip! Instead it sets up the SB600 (Southbridge) with details about buffer sizes and all the other info that AHI just provided. It also builds up a “command buffer” for talking to the sound chip, and a “response buffer” that lets the chip answer. So we now have the southbridge set up to carry sound for us, and to also handle all our control communications with the sound chip as well.. Easy, right?

Imagine how overwhelmed I was on the first day of reading all this code!

704px-amiga_1000dp

Amiga 1000

Fortunately the ground work was well done already. I started by just testing the ability to send commands and get responses. Looking over the documents, I see a command to tell the chip to “beep” all by itself, without any audio data. That was the first success! Not too fancy, but it’s proof that we can talk to the sound chip. Alex Carmona picked up that code, and used it to make a “boot sound” for X1000 owners that sounds a LOT like the original Amiga 1000.

Next up, I separated the AHI part from the SB600/sound chip part. My thinking was that it’s easier to divide and conquer. Then I worked hard on opening the audio path to the sound chip. Before too long, I had noise, but it never sounded quite right. It turned out that the buffers feeding in to the sound chip had to be handled a bit differently. I’ll try to explain:

The normal way to feed a constant stream is called double-buffering. The idea is simple. While the audio chips are playing buffer A, I’ll be filling the next sounds into buffer B. Once the player moves into buffer B, I’ll fill more into A, and keep on going. Simple, right?

Of course it is never as easy as it sounds.. A bit of digging and I learned that instead of two separate buffers, the SB600 really wants one continuous block of memory! Simple enough, I’ll just get one big block, and draw an imaginary line halfway through it.

Now to keep things simple, I start by asking AHI what size it’s buffers will be, then I make the SB600 buffers the same size. Really one big buffer the size of BOTH AHI buffers combined.. but the sound wasn’t right yet. Keep digging.. AHI gets the buffer size it wants, the SB600 gets one big buffer, which looks to AHI like two buffers side-by-side.

Now it turns out that the sound chip has buffer size limits too, and they are a LOT smaller than any of the previous buffer sizes!

The final result is one big memory block for the SB600, split into two buffers, each sized to match what AHI wants, with each of those buffers split into as many smaller “segments” at or below the max size that can be handled by the sound chip. Wow. One block of memory divided up three different ways, depending on which way you look at it.

kiss-band

Not the KISS principle

I’ll mention here that I was looking for ANY way to make it simpler.. and all of this “memory geometry” would change with every change in sound settings! So the K.I.S.S. principle took over. I decided to configure everything AFTER AHI to ALWAYS run in 8 channel 32 bit quality. Running that way, I can easily “upsample” ANY sound format coming out of AHI to one stable format. If AHI sends me mono, I copy it to left and right, and zero the other six. If it sends stereo, the last six stay muted too. If it sends me 16 bit audio, I just shift it to the high word of the 32 bit samples.

Once all that buffer stuff was wrestled into submission, we finally got good sound coming out!! Success!!!

The modefile that came with the driver had only ONE mode. Not really a good way to show off such powerful audio chips. But the previous modefiles were created with tools that we don’t have, and I could find NO documentation.. So I got to spend a day or two studying the modefiles. Once I got a good idea of how they worked, I wrote a program called “makemode” that converts a text file to a working modefile. If you need a tool, write it! This expanded our driver capability to as many modes as I choose to support (currently 3, including 7.1 audio). And as a side benefit, new modefiles can be created as quickly as they can be described. The sample rates have been increased as well. This chipset and driver support up to 192kHz, that’s about four times higher than the old “normal”.

The Beta test team has been a HUGE help in finding the little bugs that I missed. These last few versions have been pretty well behaved. If you are reading this then a public release must be “real soon”. We still have more to do, S/PDIF optical output and sound recording are still on the “to do” list. But the sound is playing, and that’s not a bad place to be today.

It has been a big team effort. Davy, Alex, René, the Beta team, and Steven for taking ENDLESS emails when I ran out of hair to pull out.

If you really read all the way to here, you get a special bonus tip: When you open SYS:Prefs/AHI to adjust the driver settings, you might try dragging the prefs window a LOT wider. The rear-panel connections for line out, line in, and microphone in are all described with the color of the correct connector listed. With six color coded jacks on the back, this might be helpful to get it into the right hole in one try. 🙂

Now that X1000 owners have an open PCI slot, what will be the most popular new “toy” to play with ?

I was Wrong

I was wrong.blog_dev

Some people have a tough time admitting they were wrong. In this case at least, I am really quite happy about it.

I was the lucky guy who got to finish the HD Audio sound driver for the AmigaOne X1000. That was a long enough story in itself and is covered as an earlier blog entry.

But due to technical difficulties, I was unable to add support for monitoring inputs “Live” and unable to add support for it in the “Mixer” program. I have had to explain this dozens of times, and it was even added to the AmigaOS Wiki X1000 FAQ. Now, just one more time, I’ll detail exactly what went wrong with these features.

9548513-no-soundThe first big problem

The audio chip in the AmigaOne X1000 follows the Intel HD Audio standard, which is emerging as the replacement for the older AC’97 standard. Most (almost all) of the existing sound drivers are AC97 based. The new standard has lots of great features but there is one particular “sticking point”. The control registers for the older cards just showed up in PCI address space. Any program that knows where to look and what values to poke* can take control of the sound card. There is a register to hold the volume, another to choose which input to use, most of the features and options are simply controlled by poking different numbers into this memory space.

These new HD Audio chips have special communications ring buffers for sending commands and data between the computer and the sound Coder/Decoder chip (Codec). It’s all detailed in the Intel HD Audio specification, exactly how instructions can ride alongside the data, how fast things move back and forth, where the response to each command will come back out of the data stream… all a rather complex but capable system for driving up to four audio codecs at once.

But there’s the problem.

We get the driver going, and AHI knows how to control volume through the “correct” means… but when users ask for “Mixer” support there is simply no PCI address space to poke numbers into. There is no way provided to get the volume instructions merged into the command stream that is already running. Mixer doesn’t work through AHI and it simply bypasses it. To explain it simply: It is designed for all the sounds and commands to come from one place, there’s no provisions for other programs to just poke numbers into the sound chip. Some programs use the volume controls provided by AHI and some ignore them and expect “Mixer” to save the day.

The second big problem

“Live” playback of audio, useful for listening to MP3 players, Audio CD’s or other sound sources. The codec is broken into small sections called “Widgets” (no kidding). There’s a Widget for each jack, a widget for each ADC or DAC, and selector widgets to choose which input to record from. There’s a map showing all the Widgets and all the connections between them in the documentation.

This does make things pretty simple to work on. Just look at the Widgets involved in the signal path and each one comes with a list of options you can control. An example, you are listening to a 7.1 channel audio recording of your favorite group. The path and the widgets involved go something like this:

AHI continues to stream 8 channels of audio data through the Ring Buffers I mentioned earlier, which then are passed to the Audio bus. There are four DAC (Digital to Analog Converter) widgets that can each take part of the data stream and convert it to 2 channels of sound. So DAC0, DAC1, DAC2 and DAC3 have controls to describe the format, sample rate and bit width of the sound data. Each one is also told which channels they are listening to. The driver is responsible for configuring all these different settings.

On the output side are four more Widgets, each describing a jack on the computer. The four widgets for the four jacks that carry 7.1 sound and there’s another one for the headphone jack. Each of these needs to be set to which DAC widget they are connected to. Most of these jacks can also be switched to an input if needed and some can even swap the left and right channels they are carrying.

Once all these widgets are set up, then the stream of music from AHI has a path to your speakers, and the music plays.

Now getting back to that problem monitoring an input live.

I checked the signal chart and I saw no connections available from any selected input back to an output. Every path was either for playing or for recording with no “feedback” available. I kept looking. I checked every option available for every input Widget and for every output widget. There was nothing marked “feedback” or “monitor.”

I was left with the conclusion that these chips don’t do live monitoring. They must need a program to record the incoming sound and send it right back out again (digital loop back).

Now that I have given such detail about all the things I couldn’t do, let’s find out just how wrong I was.

Man-Megaphone-3

At AmiWest 2013 (highly recommended, it’s a blast) I got to meet many Amiga Developers, Betas and users. One of the many friends I made was Alex Carmona. Alex is one of the other developers who has worked on this HD Audio driver and he had been looking over the documents. As luck would have it, he found two details that I had missed completely:

In response to problem 1, there is a special “back door” register where one command at a time can be added to the stream without messing about with those command ring buffers. Just one, and it will only work rather slowly, but there is the opportunity for Mixer to get some commands into the codec.

And about the second problem, he showed me a second signal chart that looked very much like the first, but it showed one possible path from a selected input back to mix live with the output! How can this be? Even if I missed seeing that from the other drawing, there are absolutely no options on either end of the signal path for turning this feature on and off. The DAC widgets don’t have it, the ADC widgets, the input selector, the input gains and volume controls. No mention ever of “monitor” or “feedback” controls anywhere in the signal path.

Somewhere buried deep in the “AFG” widget, which is mostly for chip-wide controls, there was a single bit buried there named “karaoke“. Yup, turning that on enabled the selected input to mix live with the audio out!

So finally, after reading all this, I get to the point of my story.

I told many people that the AmigaOne X1000 sound chip can not monitor inputs “live”. And I told many more people that Mixer would never work on the X1000 because there was no way to “poke” numbers in from outside of AHI. In both cases, I was wrong. A more experienced developer took the time to explain what I was missing and to help me figure out how to get there.

So, my hat is off to Alex and he deserves full credit for showing me the error of my ways.e2010010875386

hdaudio.audio 6.22 (now available to registered users via AmiUpdate) has the ability be controlled from Mixer. Javier was kind enough to add the Mixer code, so we can hope for a matching release of Mixer to support control of AmigaOne X1000 audio.

There was one more little snag. Every time any program opens AHI, all settings are forced back to whatever the boot up preset is. When I am playing an MP3 player “live” it gets really irritating. So all the Live monitoring controls have been taken out of the Mixer. Mixer has control of AHI playback and AHI recording but a separate program will be released soon that allows control of the monitor loop without AHI getting in a chance to muck things around. This monitor loop allows live playback from Front Microphone, Rear Microphone, Line In or the CD header. It might be handy for listening to analog audio from an older CD player or using “line in” you could mix in audio from a MP3 player. Or possibly to share your Amiga speakers with a second computer. Or you could even use it for Karaoke. 🙂

The users get what they asked for and they can each tell me how wrong I was the next time we cross paths. In this particular case, I am quite happy to be set straight on these matters.

And if you happen to see Alex in your travels, please thank him for being patient with the “new guy”.
We all get the benefits from it.

* “poke” as used in this article, is a reference to a BASIC command to store a value at a given address.
It usually shows up when someone is trying to reach further than the OS wants them to and it’s a
great way to screw things up if you’re not really careful. Would you want someone “poking” around
randomly into your brain?

Ready for Music!

blog_softwareThe convenience of AmiUpdate has also allowed a few additions to your AmigaOS system. Camd.library was quietly added a few updates back. This contribution provides a common interface for programs that work with music in the MIDI format to connect with MIDI interfaces or to interconnect between applications. Now programs like Bars&Pipes Professional, AudioEvolution, HD_Rec, Dg-midi-monitor, Horny and CamdPlay will no longer require the user to go download and install camd.library. It will also ease installation of newer programs like Andy “Broadblues” Broad’s Line6PodEditor and his Perl to CAMD Link (Perl Amiga::CAMD).

Now, to make things even easier for the end user, the USB driver for MIDI devices is being added to the default AmigaOS installation as well. This means that if a user plugs in any MIDI class compatible USB device, AmigaOS will recognize the device and make it available to any program.

These additions together make programs for music much easier to install and run, so you can get right in to making music without worrying about the libraries and drivers to install.

71170_l

Bars&Pipes Professional and camd.library are maintained by, and the USB MIDI driver for camd was written by Lyle Hazelwood. Lyle accepts donations for his software at Lyle’s web site.

Delock PCI Express Sound Card supported

blog_miscAndreas Goiczyk has reported that the Delock PCI Express Sound Card 7.1 works well with the newly updated Envy24HT audio driver.

Thank you Andreas for letting us know!

If you discover a sound card not listed is supported by an AmigaOS audio driver, please use the contact form on the AmigaOS web site to let us know.

More Noise from ACube

blog_softwareThe VIA Envy24HT audio driver has been updated and now supports the VT1618 Codec. That means you can now use inexpensive PCIe audio cards such as the Syba SD-PEX63034 in your AmigaOne 500 and AmigaOne X1000 systems.

Here is a list of audio cards that are known to work with the Envy24HT audio driver:

  • Terratec Aureon 5.1 Sky
  • Terratec Aureon 7.1 Space
  • Terratec Phase22
  • Terratec Phase28
  • M-Audio Revolution 5.1
  • M-Audio Revolution 7.1
  • ESI Juli@
  • ESI Juli@ XTe
  • Speed Dragon EAU01A-1
  • Syba SD-PEX63034

If you happen to have audio card not on this list which also works with this driver please notify us via the AmigaOS contact form.

Special thanks to ACube Systems for helping to improve the Envy24HT driver.

The updated driver is being delivered to registered AmigaOS users using AmiUpdate. If you have any support issues with the driver please use the AmigaOS support forum for assistance.

AmigaOS 4.1 Update 5 Released

AmigaOS 4.1 Update 5 has now been released.http://upload.wikimedia.org/wikipedia/en/0/05/Boingball.png

More details and a place for registered users to download the update can be found at Hyperion’s main web site.

The following AmigaOS platforms are supported:

Besides the usual bug fixes, some highlights include:

  • Optimized DMA copy routines for 440ep and 460ex based platforms.
  • SM502 audio driver and Mixer for AmigaOne 500 systems (460ex).
  • Updated Radeon, R200 and Permedia2 Warp3D drivers. Per-application configuration is now possible to help work around bugs in old software. User documentation is provided on the wiki.
  • Catweasel driver for floppy disk, SID chip and joystick support.
  • MIDI support now included via the camd.library.
  • Professional photograph backgrounds provided by mediacube.
  • Improved Amiga 68K emulation. A full Workbench 3.1 installation is now included. Authentic Amiga ROMs and Workbench files are provided in the new Emulation drawer.

AmigaOS support is available via Hyperion’s support forum.

A special thanks to the AmigaOS development and testing teams for their hard work on this release!